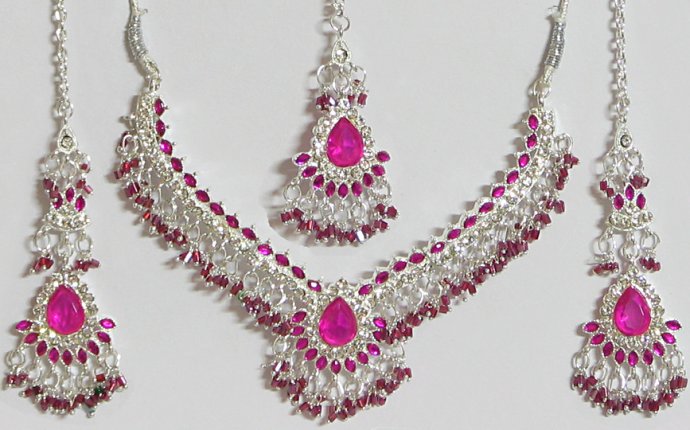
Easy homemade earrings
 I’ve always enjoyed creating homemade gifts for holidays and birthdays. In the last couple of years, family members may have even enjoyed receiving these gifts! They stuck with me through all the really odd mishaps and didn’t turn out as planned designs, and now here I am blogging tutorials and spending my weekends at craft shows. I’m sure I’m not the only person who enjoys making presents, so today I’m really excited to announce the first post in a series of homemade gift idea tutorials!
These tutorials are different from others I’ve written (and will continue to write) in a couple key ways: they are designed to create something gift worthy and to minimize the amount of special tools and/or materials needed. I’m kicking the series off with a tutorial on how to make origami paper leaf earrings. They are simple to master, impressive to look at, and can be personalized easily simply by changing what paper design and size you use. Let’s get started!
Supplies for origami paper leaf earrings
- A sheet of origami paper + additional pieces of paper/more origami paper to practice. I recommend 3″ or 2.5″ paper.
- A pair of scissors.
- Glue – a glue stick, rubber cement, silicone adhesive, etc. Just about anything will work.
- Two jump rings.
- A pair of earring hooks.
- Clear, matte acrylic spray (optional but recommended)
 If you’re really looking to minimize the amount of materials you need to purchase, you can salvage a couple of jump rings and ear wires from another pair of earrings that you don’t like any more, have lost some beads, etc. You can also make your own jump rings with a piece of wire and anything fairly small and round, like a pair of needle nose pliers or even a large nail.
How to fold origami leaf earrings
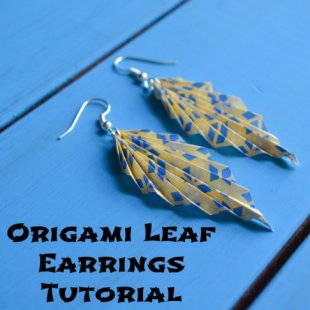
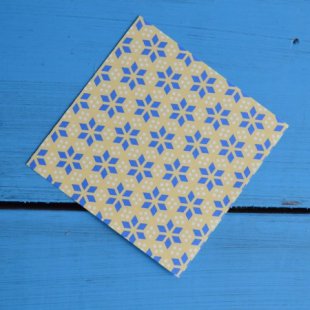
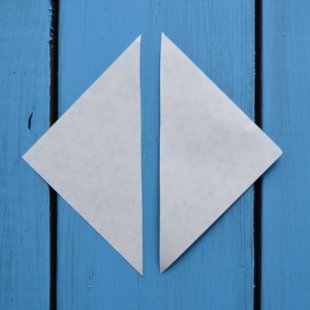
1. Fold your square piece of origami paper neatly in half to form two triangles, taking it from this:
To this:
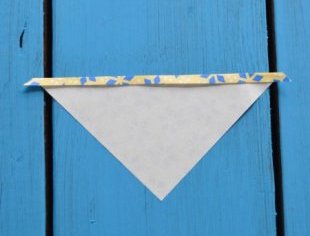
2. Next, unfold the paper and carefully cut along your fold line to create two triangles.
3. Place the patterned side of one triangle down on your work surface and create a small, even fold, as shown below. This fold should be 1/4″ wide or less.
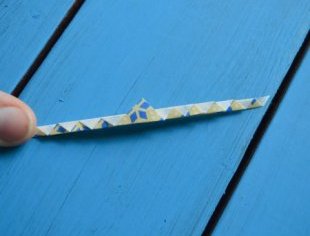
4. Continue making folds back and forth, as shown, until you’ve folded all of the paper out to the triangle’s point. Take care to make each fold the same width as the previous ones and crease them with your thumb nail (or even a bone folder, if you have one) to make sure they’re nice and crisp.
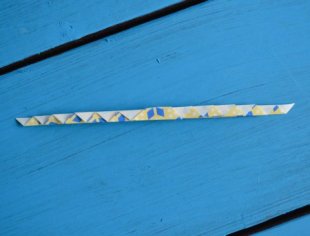
5. Cut off the little remaining triangle tip.
6. Carefully fold the piece in half, as shown below, and crease the fold as firmly as possible.
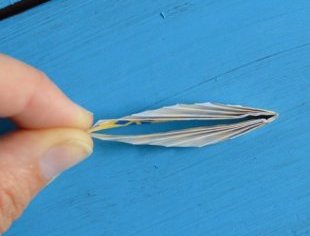
7. After finding and creasing the half way point, slip a jump ring over the folded papers and slide it to the fold.
8. Following the directions for your specific adhesive, carefully glue the folded paper together only along the first, center fold. Make sure you don’t get glue all over the other folds or the leaf won’t fan out!
9. While the first leaf is drying, repeat steps 1-8 for the other triangle of paper.
9. After the glue is dry, carefully fan out the leaves.
11. If desired, coat the back and front of both leaves with a clear, matte acrylic spray, like Mod Podge or Krylon. This enables them to hold their form better and makes them much more durable.
12. Hang ear wires from the jump rings and admire your new earrings!
So, what do you think? I love them! Have you ever worn paper jewelry before? You obviously shouldn’t wear them to the pool, but I love how lightweight they are because it makes them very easy to wear and perfect for people with sensitive ears.
No craft store nearby? Here are some of my favorite items for this tutorial:
I hope you enjoyed the first installment of my easy homemade gift idea tutorial series! I’m looking forward to sharing my ideas and really hope you stop by on Thursdays over the next three months to check for more tutorials. Each one of them will be easy to accomplish, even with limited prior crafting experience and equipment, and will create a gift-worthy item to be proud of. If you have any questions about a tutorial, please don’t hesitate to ask – I am always happy to help out!